Hello!
My local quilt group, Hawke’s Bay Patchwork and Quilter’s, have asked me to help out with their up-coming ‘Give It A Go’ day. A fun day for members to try something new.
Free Motion Quilting, Needle Turn Applique, Making More Fabric are on offer and I have been asked to share my Thread Painting techniques. I thought my preparation for this day would make the ideal subject for my first blog post.
Thread Painting
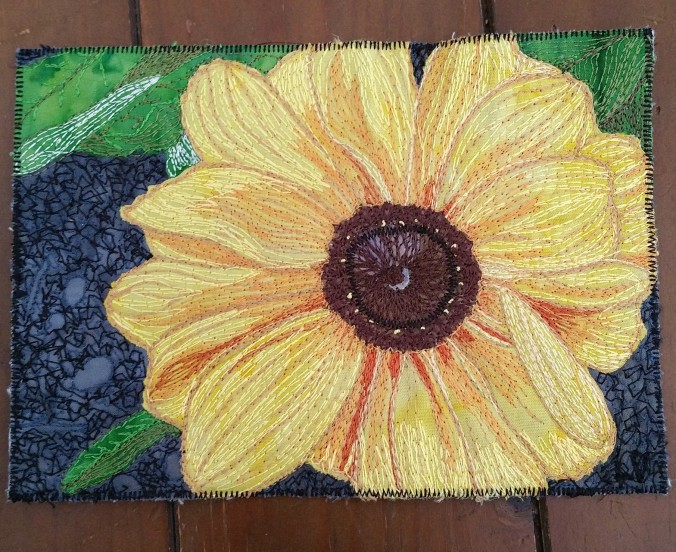
Thread painting is the technique of using thread to add colour and texture to an art quilt. The quilt top can be raw edge appliqued as in this example or could be a whole cloth quilt with the design painted on with fabric paints prior to stitching. The outline is thread sketched and then various colours are auditioned to imitate the shading and highlights of the original photograph. Thread painting is completed before the top is sandwiched and quilted.
The Process:
- Source Photograph
Edit photo to position subject for the best effect. Save as – to ensure your original is not changed. Open Picture Sketch Camera – My Perfect Pics Effects 365 http://www.appsgalery.com/apps/picture-sketch-camera–my-perfect-pics-effects-365-277161. Once you have installed and opened the app on your PC click on photos – find your saved photo, open. Crop again if necessary, click on the tick when you are happy with the composition. Note you can adjust using the buttons along the bottom depending on how you want your finished image to look. Ie portrait, landscape, square, free size.
Next step: use the buttons along the bottom to view your image in different styles. This is where I choose a style that will make it easier to trace the shapes. Button 1 or 19 usually gives a good line drawing. I use button 2, 9 or 18 to distinguish the colour values. - Print Pattern
Go to blockposters.com. Follow the steps to posterise your image. Upload your image – find saved Pencil Sketch – open. Customise your poster. Change the settings to achieve the size and orientation you want. Tick the Ts & Cs box – then create my poster button. Download your poster button. Print and sellotape your poster together. - Pencil Tracing
Using a lightbox tape your pattern down. Make a tracing of your quilt. This is where I decide which elements I will keep and which I will leave out. Often there is too much going on in the background. These elements can be left out so that your main subject is the hero of the quilt. Make a cellophane tracing from your pencil tracing using a sharpie pen. This will be used to make sure your fabrics are in the correct position. - Prepare Fusible Webbing
Turn the cellophane over and mask to the lightbox. Trace the required shapes onto the paper side of fusible webbing allowing extra on edges that will go below another piece. Cut out the shapes with 1/8” around each. - Prepare Shapes
Iron fusible webbing to the back of fabric. Cut out shapes on the line. Mark the petal lines on your flower with a soft pencil using the light box. Mark pencil lines on leaves.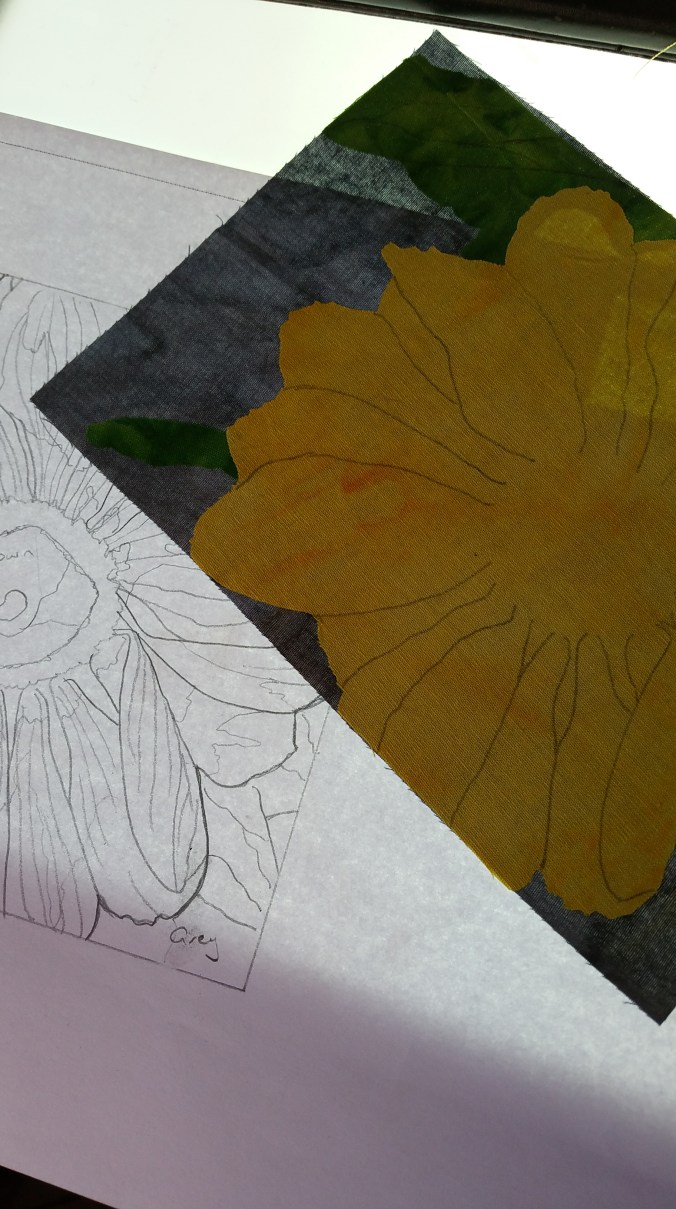
- Prepare the Quilt Top
Cut the background piece slightly larger than your pattern. Thread painting will ‘pull up’ your piece depending on how much thread painting you do. Layer the pieces to your background using the cellophane to position them. Do not iron on the brown flower centre at this stage. Be sure to iron them on in the correct order. Cut a piece of light weight interfacing the same size as your background. Pin in place (don’t iron on if using fusible).
7. Audition Threads
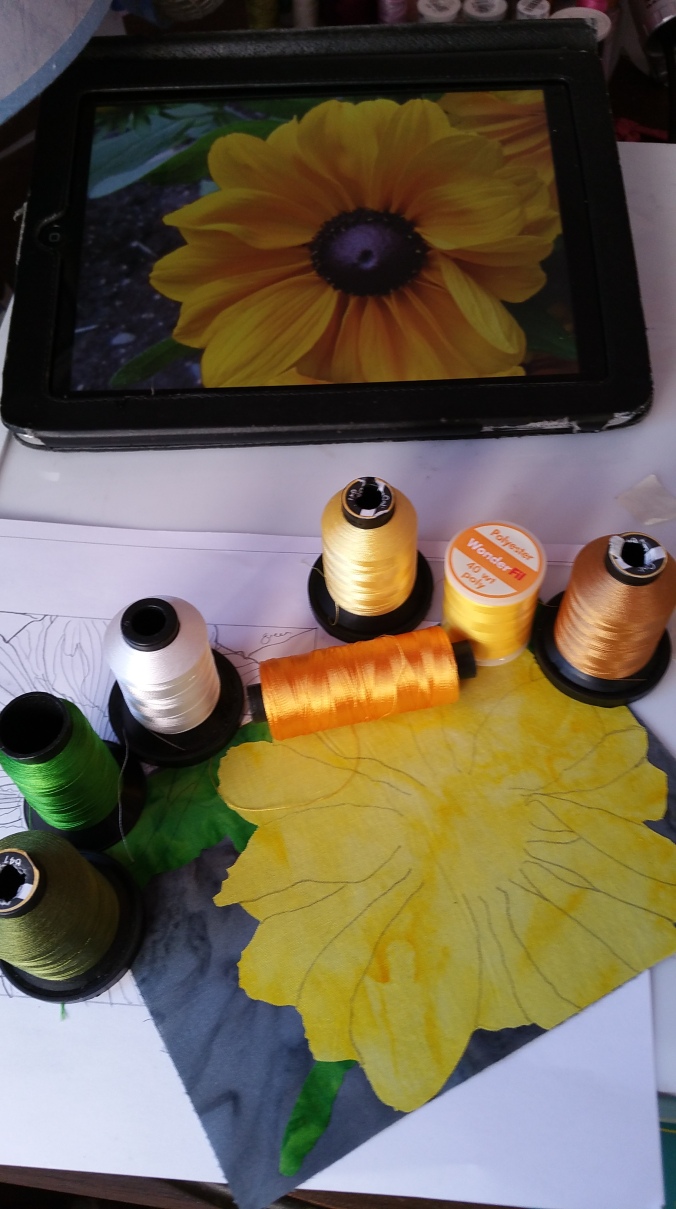
Take a critical look at your photo and decide which threads you are going to use where. Use your paper tracing and soft pencil to sketch the outlines of where each colour will go. Use this as a guide when you are stitching. I have used a textile pen to darken parts of the flower centre prior to stitching.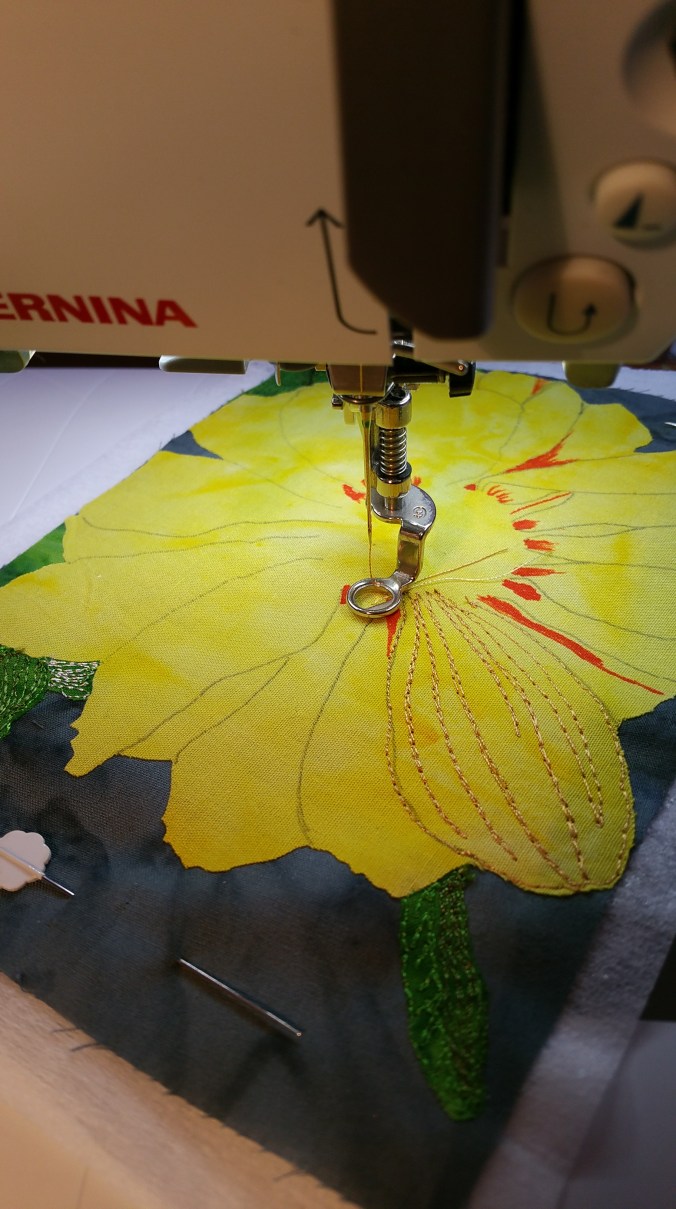
- Begin Thread Painting
Drop your feed dogs and attach a free motion foot to your machine. Tension 0 on top. Similar weight thread top and bottom. Thread the bobbin through the eye on your bobbin case.
Practice on a scrap first. Prepare a piece similar to your quilt top with interfacing at the back to emulate the ‘feel’ of your quilt top. Use your pencil to draw similar shapes so you can practice the technique and test your tension.
Thread sketch over the pencil lines on your flower referring to you photo regularly. Change threads as required to create the shaded effects on the petals. Dark thread for petals in the shade – light thread for the bits that catch the light. There will be puckering, most will disappear when it is quilted. If you are concerned add another piece of interfacing to the back of your work to better stabilise it.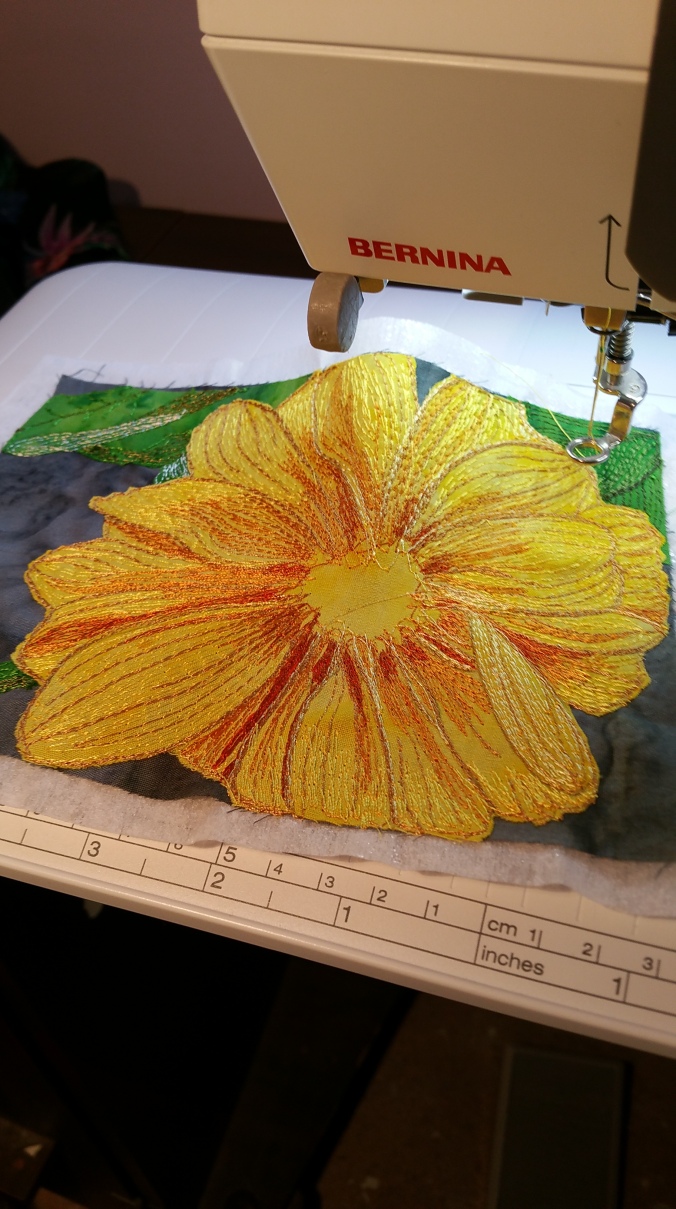
- Flower Centre
Iron on the flower centre. Lightly draw with pencil to define the light and dark areas. I added a little white textile paint to define the lighter area before stitching. Thread paint to match the photo. Add small yellow French knots.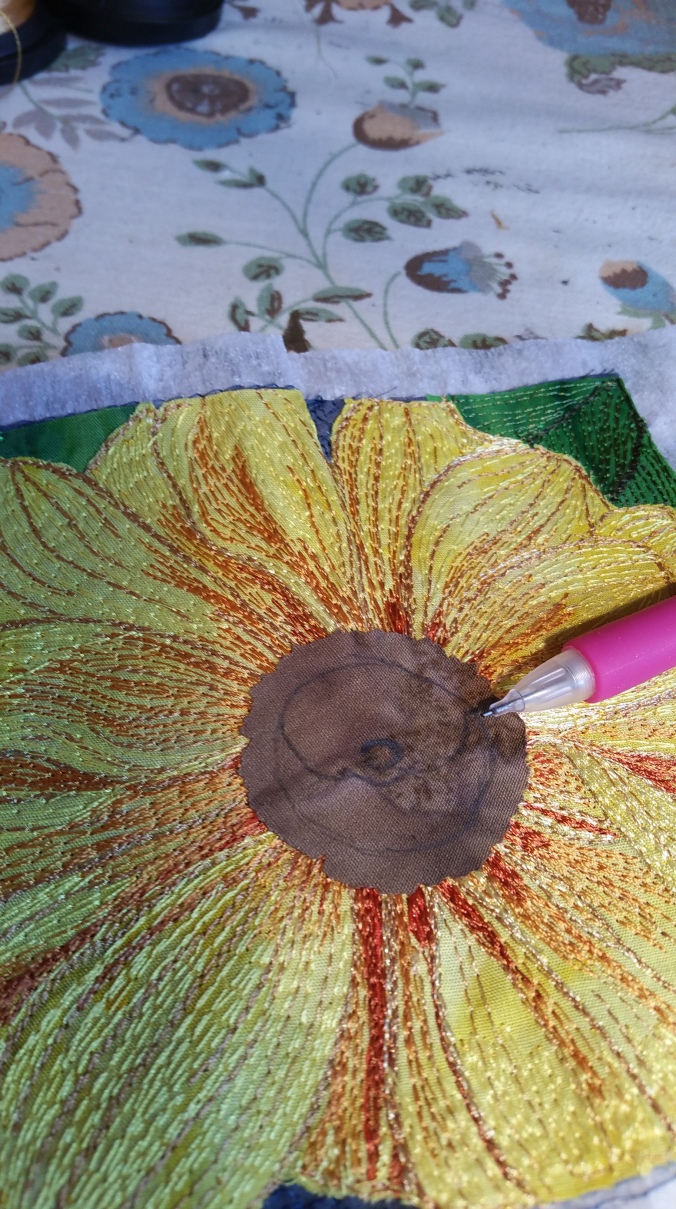
- Prepare the Quilt Sandwich
Layer the top, batting and backing and pin as necessary. Quilt around the petals, centre and leaves. Quilt heavily in the background areas. This will give the flower and leaves more loft. - Finishing Your Quilt
Carefully square off your quilt and finish as preferred. I chose to use a small zigzag with black thread to frame my postcard.